


I’m not good at writing tech articles and I think the reason is twofold : (1) I’ve never found the tech articles I read very interesting and (2) I’ve never owned a typical car found in a tech article – i.e Chevy.
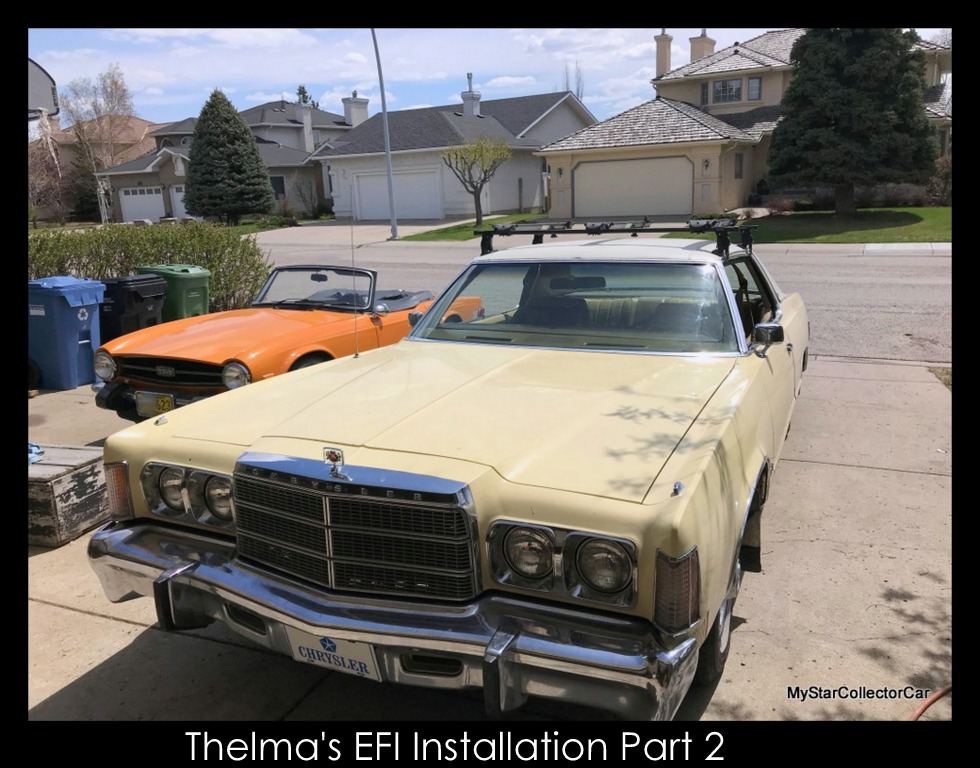
That’s probably the reason why I haven’t written a part two to the EFI install in my 1977 Chrysler Newport (Thelma).
I was pretty excited after I ordered the parts anticipating the process so I funneled that excitement into the first half of this article. I was right to be excited. Installing the EFI Kit on Thelma was exceedingly fun.
I’m a martyr to cars. Most of my Saturday mornings are dedicated to cutting out rust, grinding and welding. So, to get to take a break from that to do some actually fun wrenching was a very welcome distraction.
I’m not one to eat my dessert before finishing my peas I did also take the opportunity to also install a new lightweight starter; re-seal the pan valve cover gaskets; install a new rear seal and blast and paint the pan and intake manifold. I’ll give you a minute to take that all in.
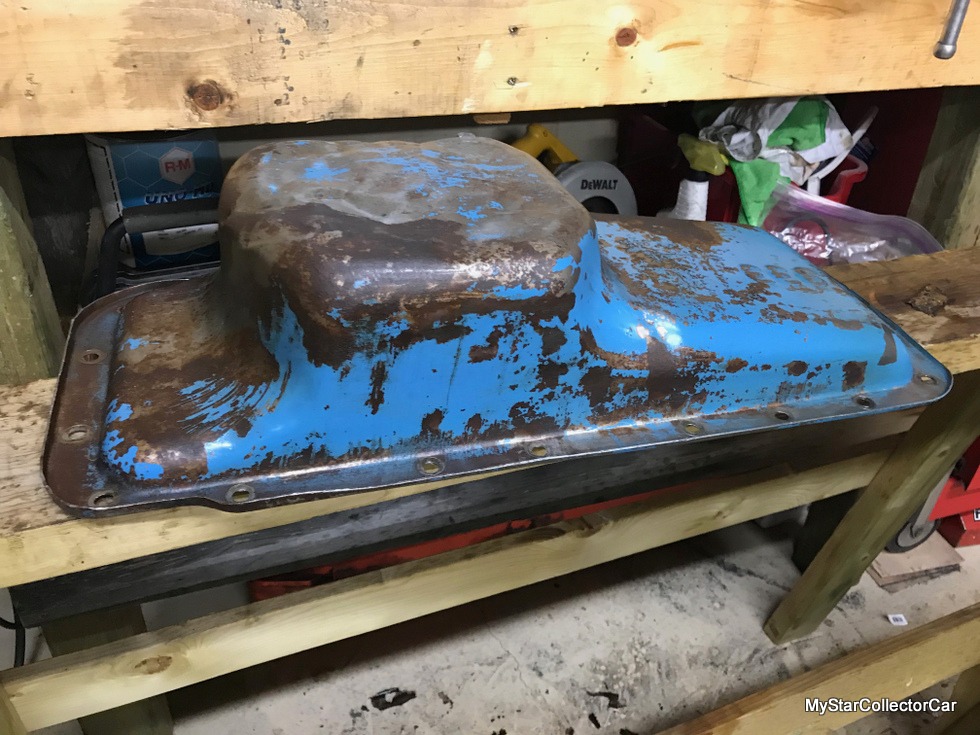
During this process, I also took the opportunity to remove the mechanical fuel pump and install a blocking plate. Starting with this project I’ve start gluing my gaskets to whatever I’m installing with some spray contact adhesive. I’ve been pretty happy with the results so far.

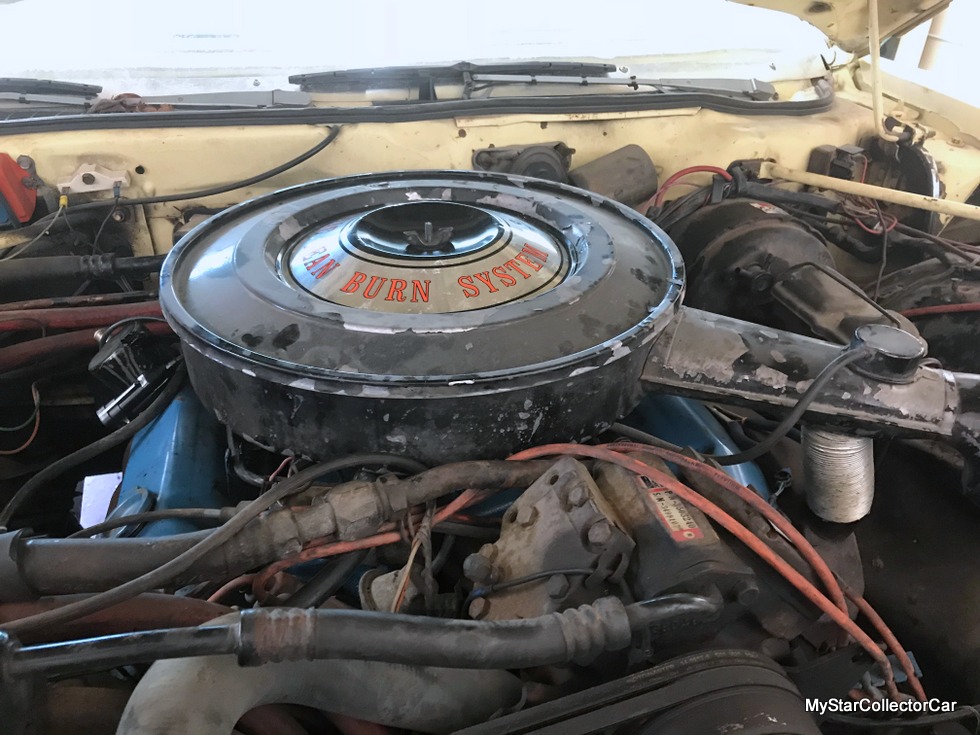
After reinstalling the pan; valve covers; the manifold; blocking off the fuel pump and installing the new starter I was left with an engine that was sealed and looked good but had no carburetor or way to get fuel to that not existent carburetor. So for the next few days there Thelma was waiting – and as the late-great Tom Petty said – the waiting was truly the hardest part.
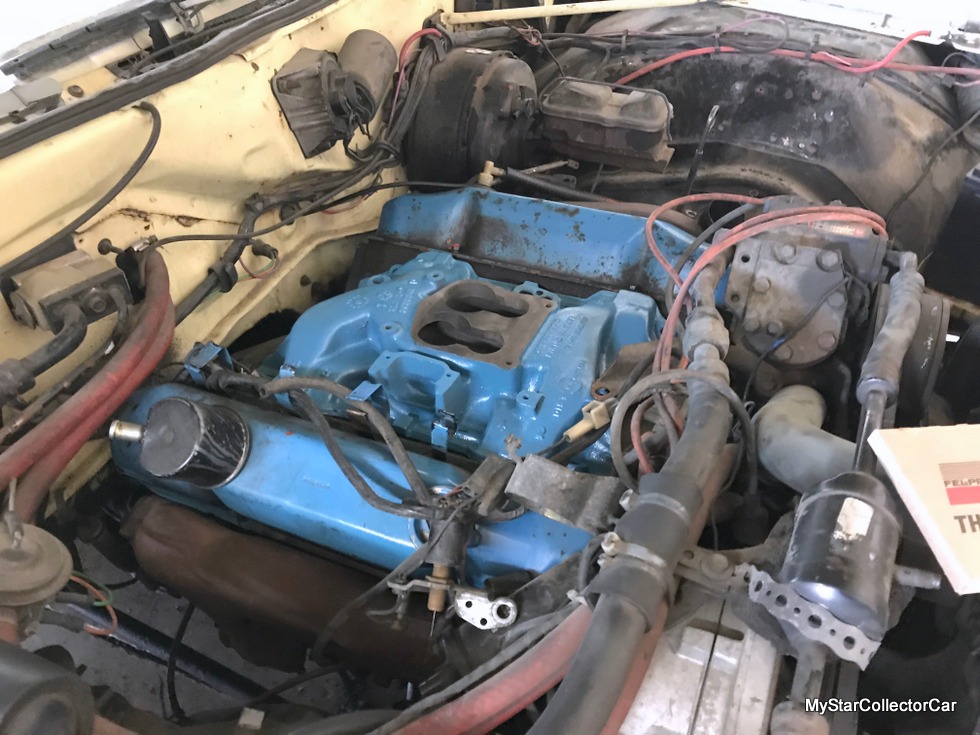
It’s important to point out here that it was at this point I made a huge error. I had filled the car with oil just to see if I had any leaks with no pressure, but after installing the pan I forgot to install an oil filter. I did, however, remove the oil filter so I was without an oil filter. It wouldn’t be until I first started the car at a later date that I would discover this when my garage then had a lake of very expensive green oil from Bradley, Pennsylvania.
It was just before my next weekend that my EFI Kit showed up at my doorstep. I was very excited to get it. The company has a few videos on Youtube about installing this EFI kit so I figured at this point I was an expert.

I started with the throttle body because that’s the coolest part. As I suspected in part 1, I did need an adaptor for the throttle body to mount to the manifold. The Chrysler 400 of this period has a ‘spread bore’ opening and the throttle body has a standard bore. It wasn’t a big deal because I had the dealer throw it in the box with the EFI Kit and charge me accordingly.
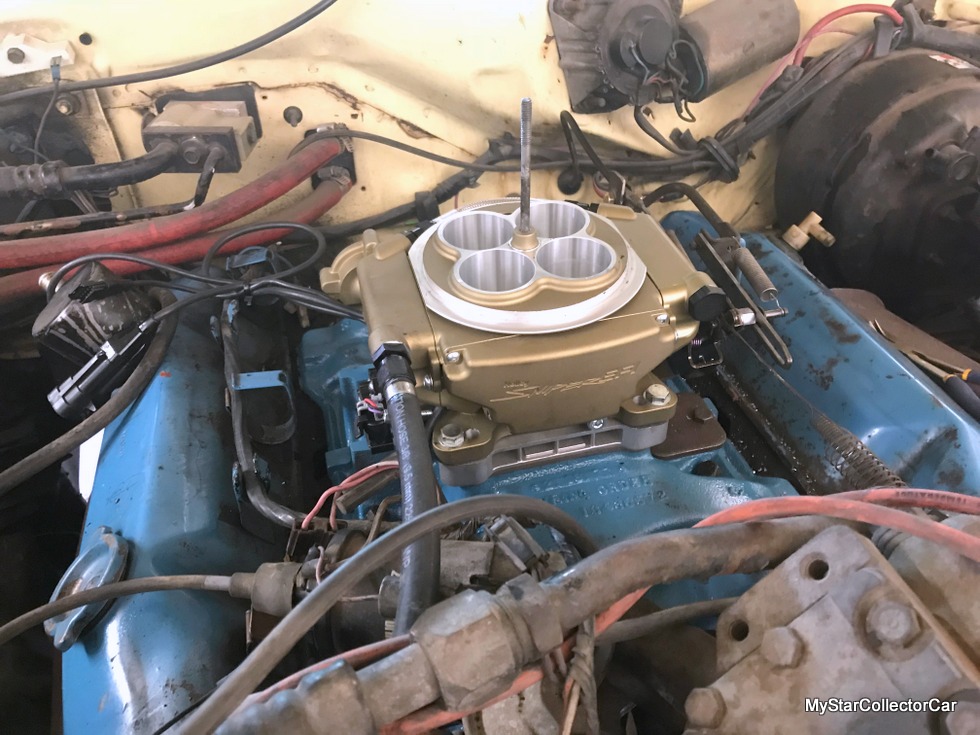
What did worry me about the adaptor and the throttle body was the overall height. After mocking everything up and reinstalling the air cleaner, I was happily surprised that the hood still closed without interference.
I did however, cut the rod for the air cleaner down and re-threaded the cut end to accommodate the throttle body to have it thread in at the top of the unit instead of lower as it was with the Thermoquad setup. This wasn’t a big deal plus it was only the second time I got to use my tap and die set.
The throttle linkage and kickdown was a little more involved. I had to build a bracket to make this work as it should. There was also piece in the throttle mounting plate on the unit I had to make a little larger. I have to say this was the hardest part of the project. But after some thought and implementing a pretty simple solution I was really happy how this part turned out.
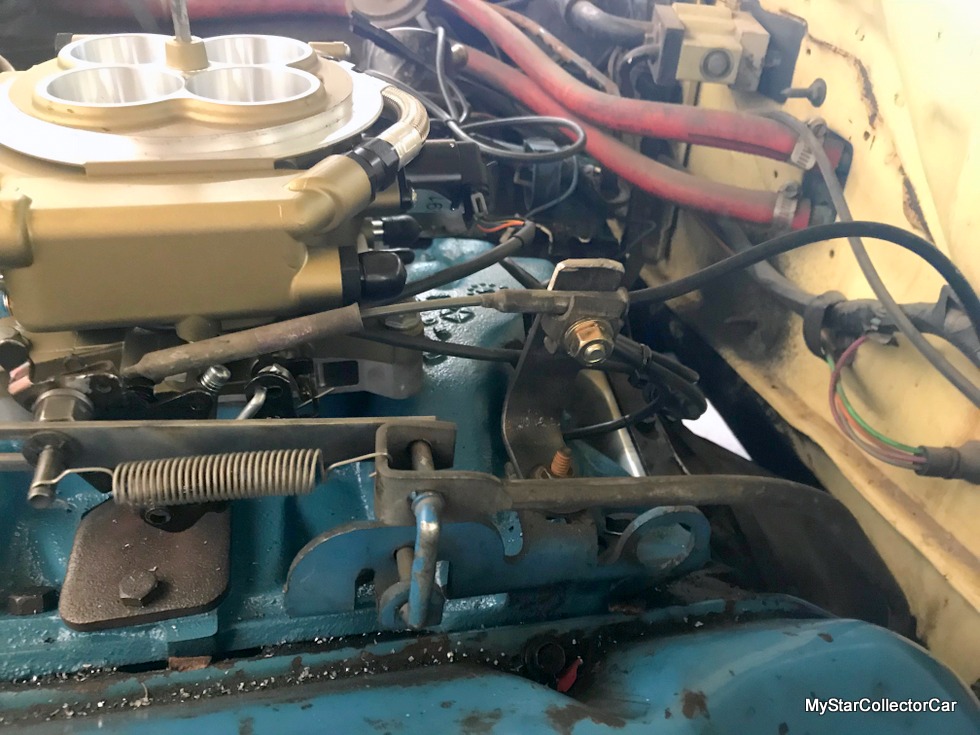
This project turned out to be all I had time to accomplish that weekend because I had other obligations but I was pretty happy the throttle body was installed, hood could close and the gas pedal and kickdown were connected.
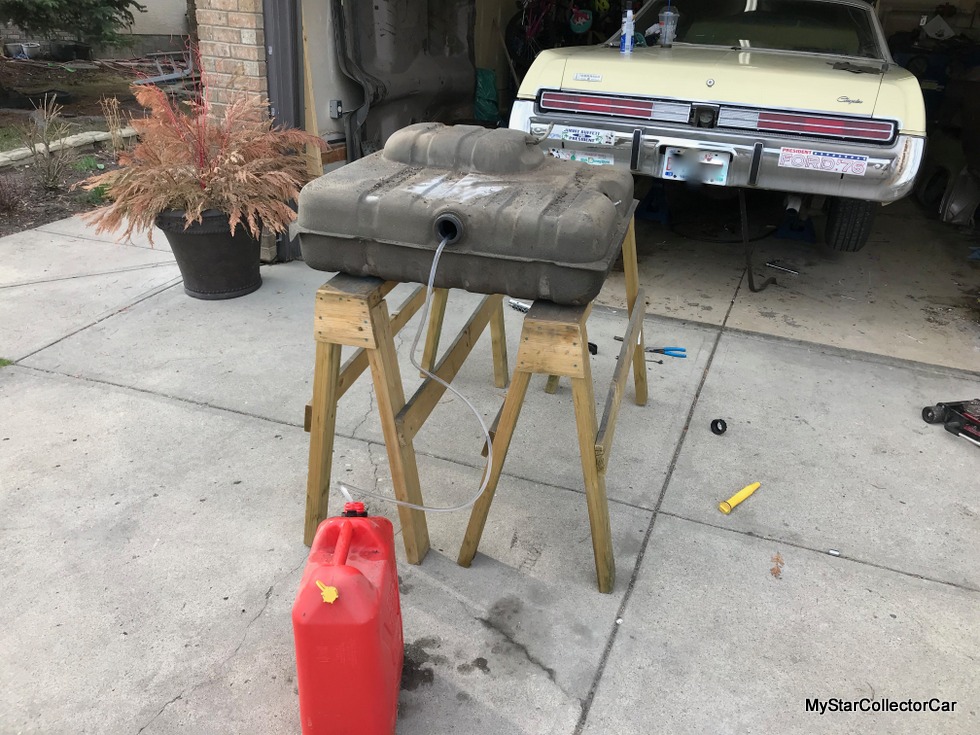
This specific setup required a fuel return line to be run from the throttle body back to the gas tank so my first task on the next weekend of work was to drop the gas tank. Me being me, I didn’t empty it before I removed it. It only had a quarter tank in it so it wasn’t too hard to handle. But after it was out I made sure to get most if not all the gas out. This was also the point when my neighbors got a little curious – and rightly so, because this setup doesn’t instill confidence.
After getting the tank empty, I needed to drill a hole in the tank. It is recommended that you steam out a tank before you drill or weld on it. Not having a steamer or that kind of time on my hands I decided to just fill the tank with water and drill while the area I was drilling in was underwater.
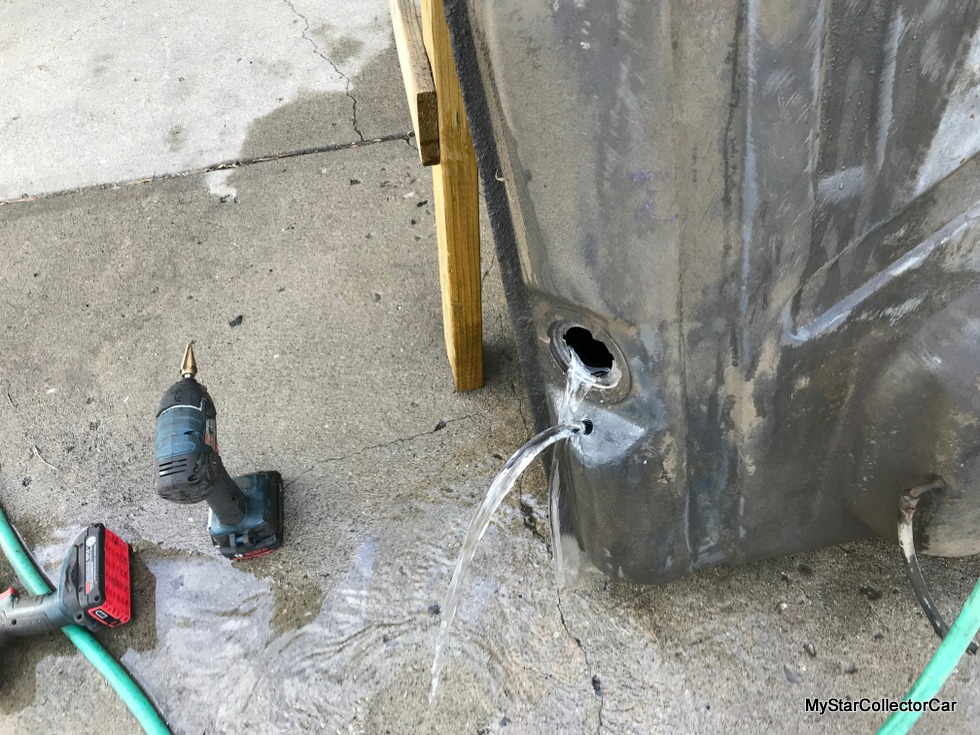
I had seen this done before although I can’t remember where. It worked fine and I got my hole drilled and made sure I got all the water out.
The next issue was mounting the threaded elbow in the new hole and tightening down a nut and a rubber washer from inside the tank. After a few failed attempts, I was able to tape the washer to a large piece of painters tape and swing it over to the elbow through the fuel gauge float opening. I was able to the same for the nut.
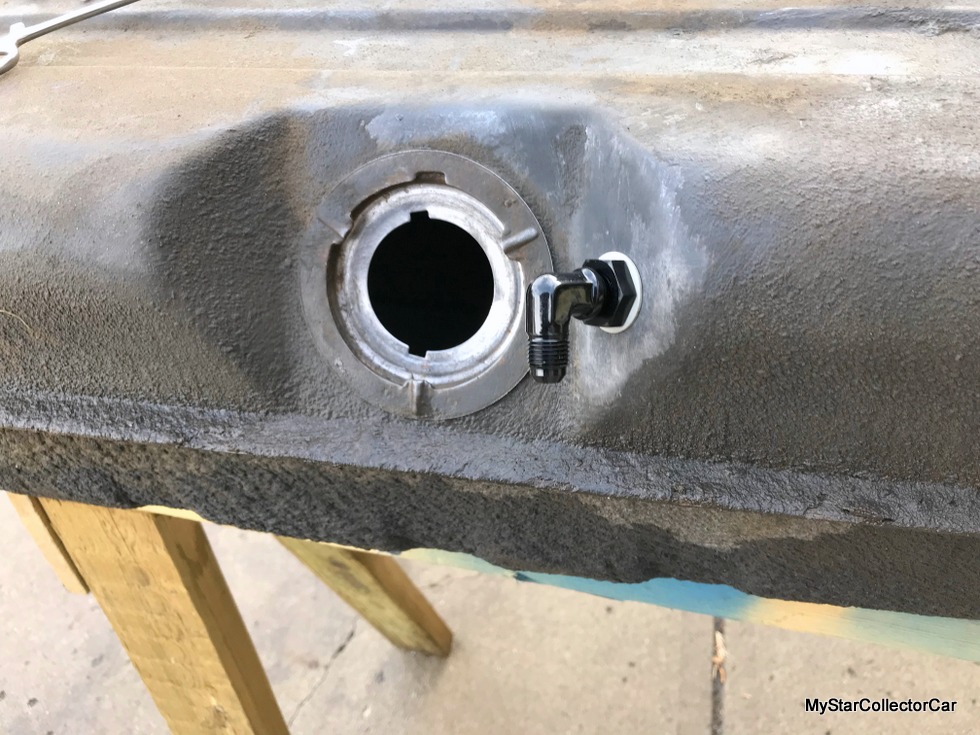
Once the tank was finished and drying out, I was able to turn my attention to installing the new electric fuel pump that came in the kit. It is recommended you mount it as close to the fuel tank as possible so I figured that right next to the tank was the best place. I had to run the power wire all the way from the front of the car – a task that involved forty minutes of contorting around the back of the car with the back seat out more than anything else. The ground wire could mount directly to the frame rail so that made me really happy. There’s a filter required before the pump and after the pump. I mounted the before here and the after in the place the old filter was mounted – near the front of the engine.

With the pump mounted, I was able to turn my attention to the last major task which was installing O2 bung in the exhaust. I had the exhaust collector disconnected from the manifolds for the pan install and just left it that way until now. That way I could just weld the bung in on my workbench. It’s important to point out at this point that the kit comes with a strap for installing the O2 sensor that doesn’t require a welding in a bung.
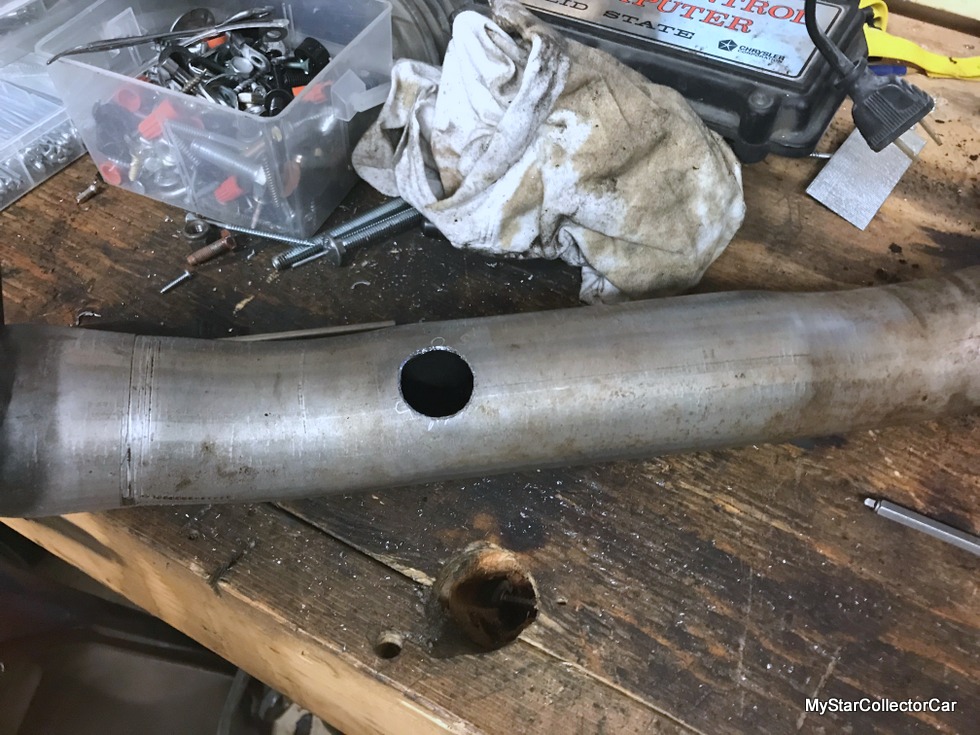
But I have a welder and I picked up a bung at the local hot rod shop so I decided to do it the hard way. It’s not my best welding but no one will see it so…stay tuned for the final chapter in Thelma Part Three.
By Angus Sutherland–Car Addict in Residence
Angus Sutherland is a freelance contributor to MyStarCollectorCar. He’s got his hands dirty on many occasions so he knows all about the less glamorous side of the hobby. Take a look at one of his automotive odysseys in his blog The TR6 Project.
- CLICK HERE to Like us on Facebook
- CLICK HERE to Follow us on Twitter
- CLICK HERE to Follow us on Pinterest


